
How to Annotate and Export a PDF with Helperbird
A complete walkthrough of annotating a PDF in Helperbird. Add text boxes, draw, take notes, then export the finished PDF with every annotation baked in.
·
- features
This guide walks you through the whole process: opening a PDF in Helperbird, marking it up with text and drawings, and exporting the finished file with every annotation permanently included.
Everything happens in your browser. There is nothing to install beyond Helperbird, and the exported PDF is a standard file that opens in any PDF viewer.
What You Can Do
Inside the Helperbird PDF reader you can:
- Type on the page - drop a text box anywhere and type into it, with bold, italic, underline, lists and color
- Draw and highlight - freehand pen, rectangles, ovals, lines and arrows in nine colors
- Take notes side by side - a full notepad next to the PDF, with voice typing and spell check
- Export the finished PDF - download it with your changes baked in, or grab the original untouched
Who is This For?
- Students filling in worksheets, lab sheets or exam practice papers on a Chromebook
- Teachers marking up handouts or leaving feedback on submitted work
- Assistive technology specialists setting up accommodations for students who cannot handwrite
- Anyone who needs to sign, fill in or comment on a PDF without buying separate software
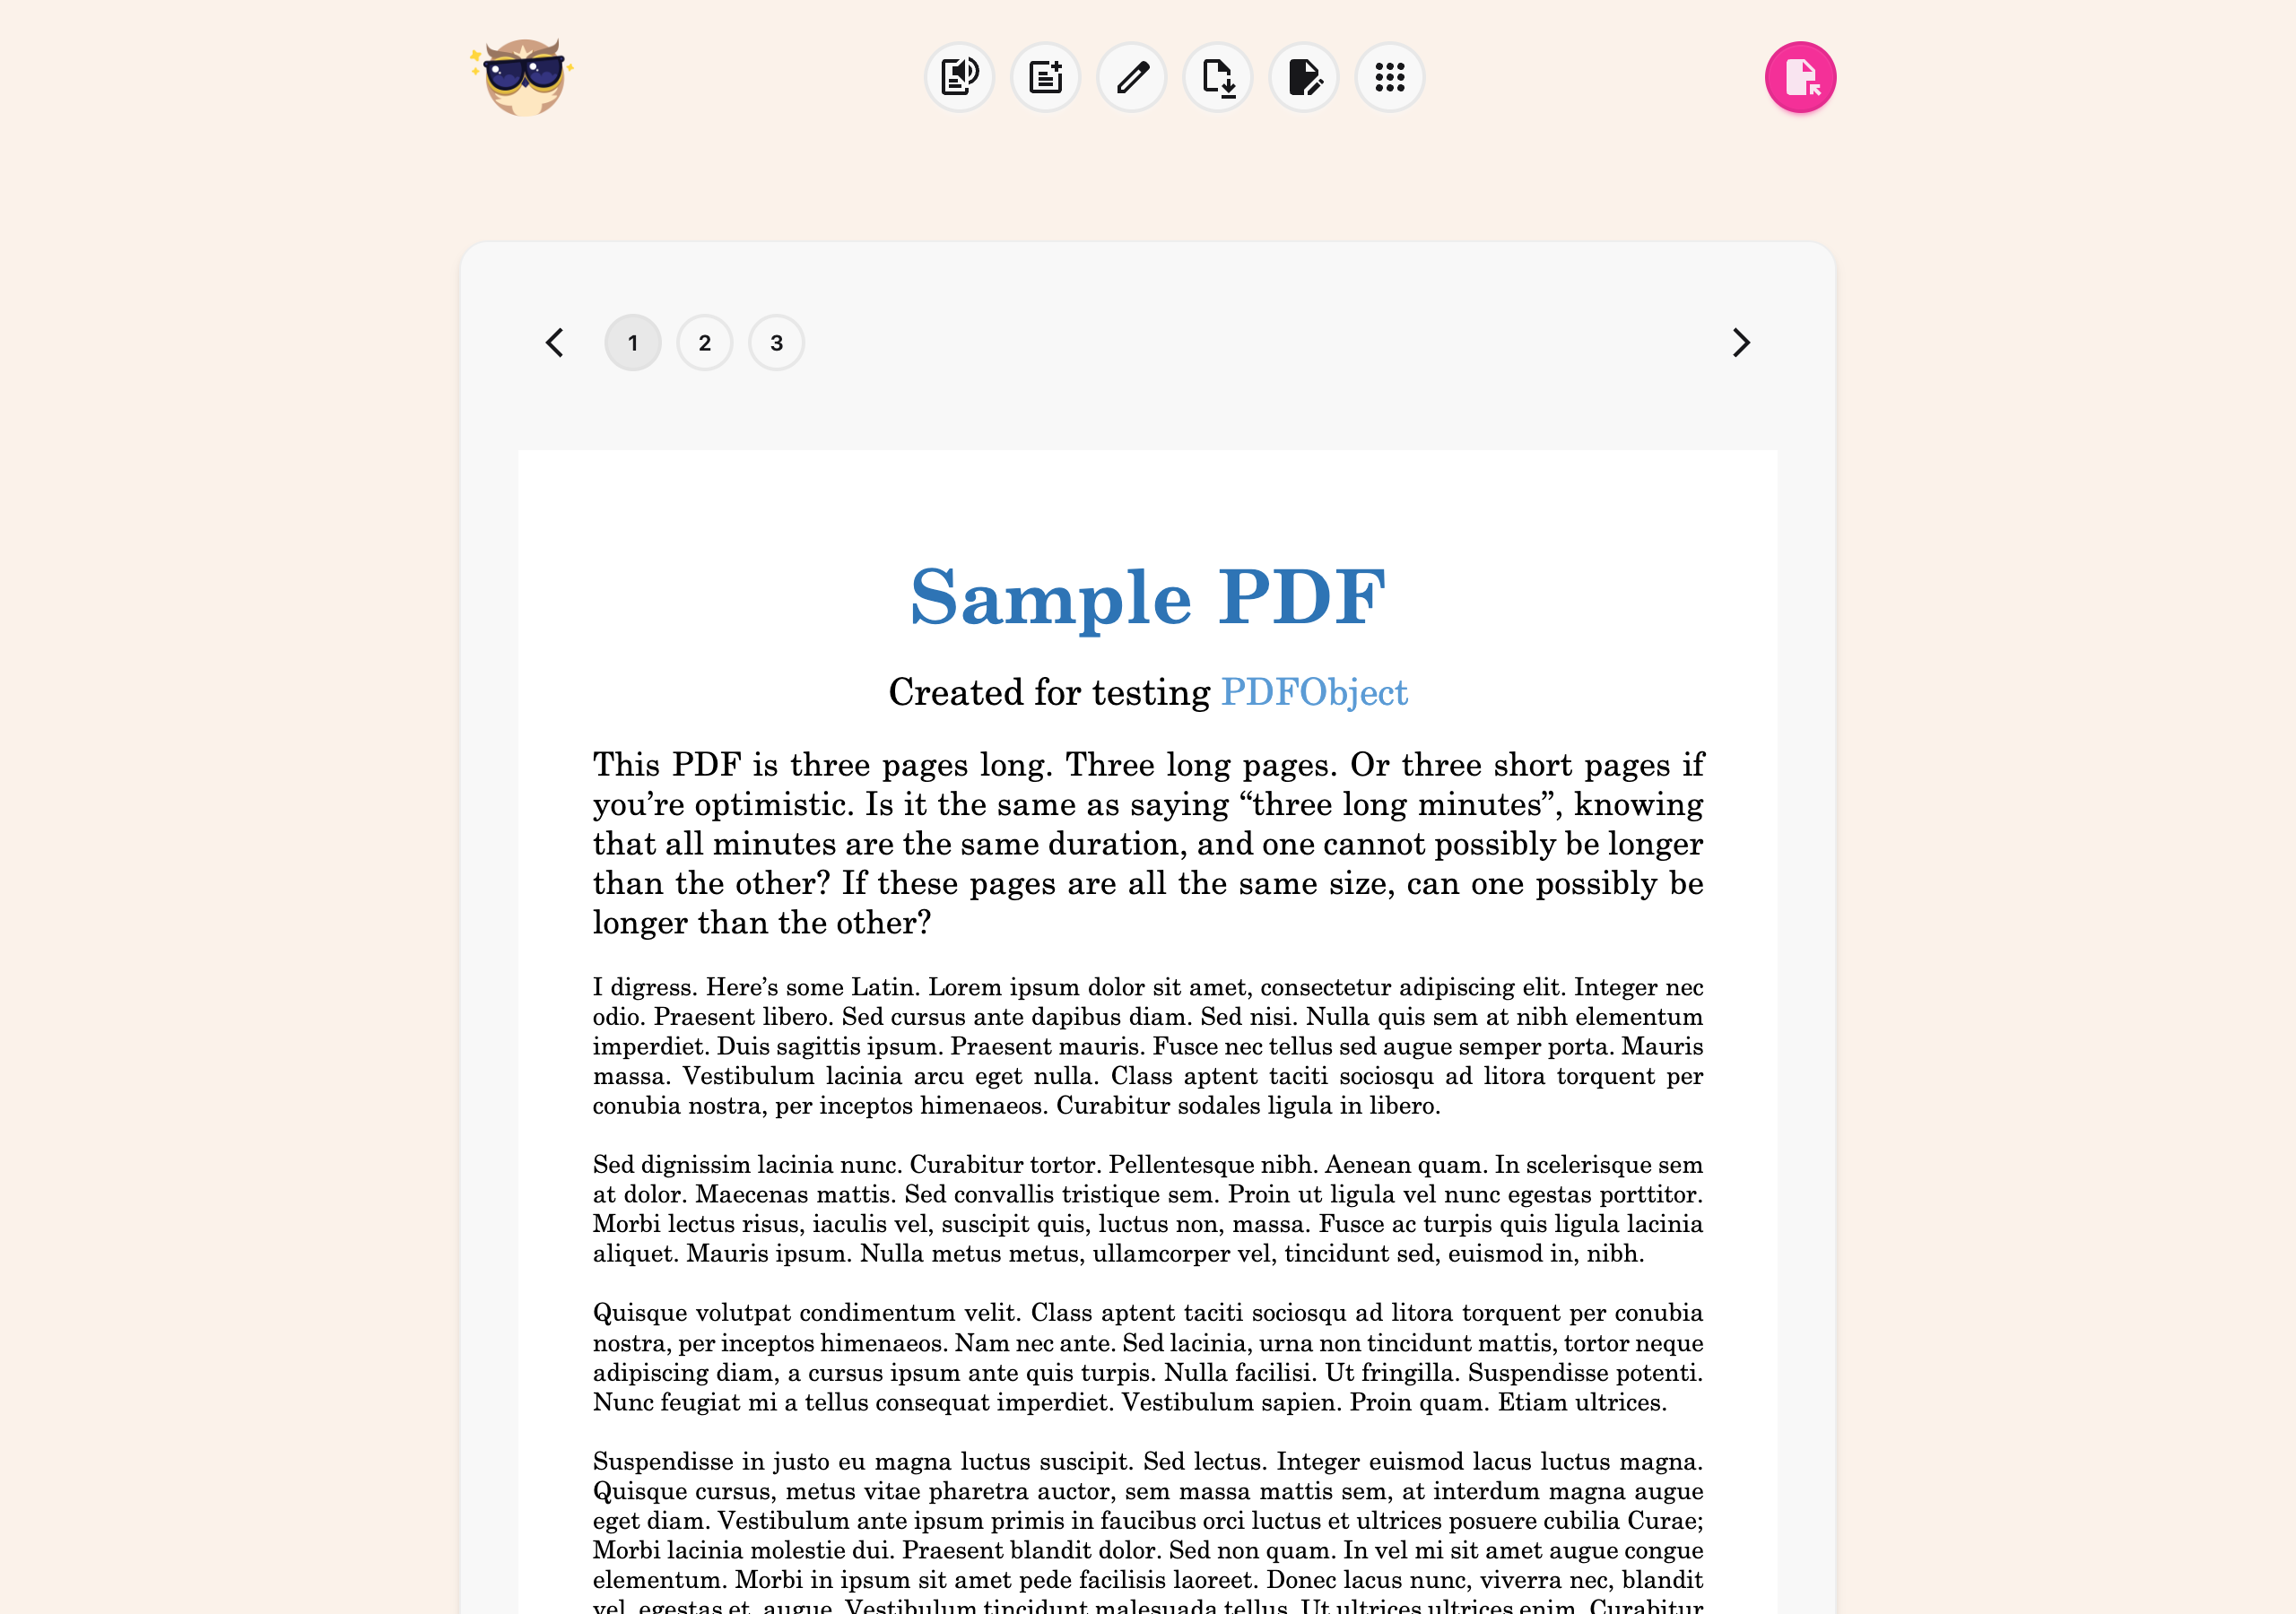
Step 1: Open Your PDF in Helperbird
Open any PDF in your browser, whether it comes from a website, Google Drive, Google Classroom, Gmail, or a file on your device.
A green Click to open PDF in Helperbird message appears at the bottom of the page for a few seconds. Click it. If it has gone, open the reader from the Helperbird popup instead.
The PDF opens in Helperbird's reader with the annotation toolbar across the top. Use the page numbers and arrows to move between pages.
Step 2: Add Text Boxes
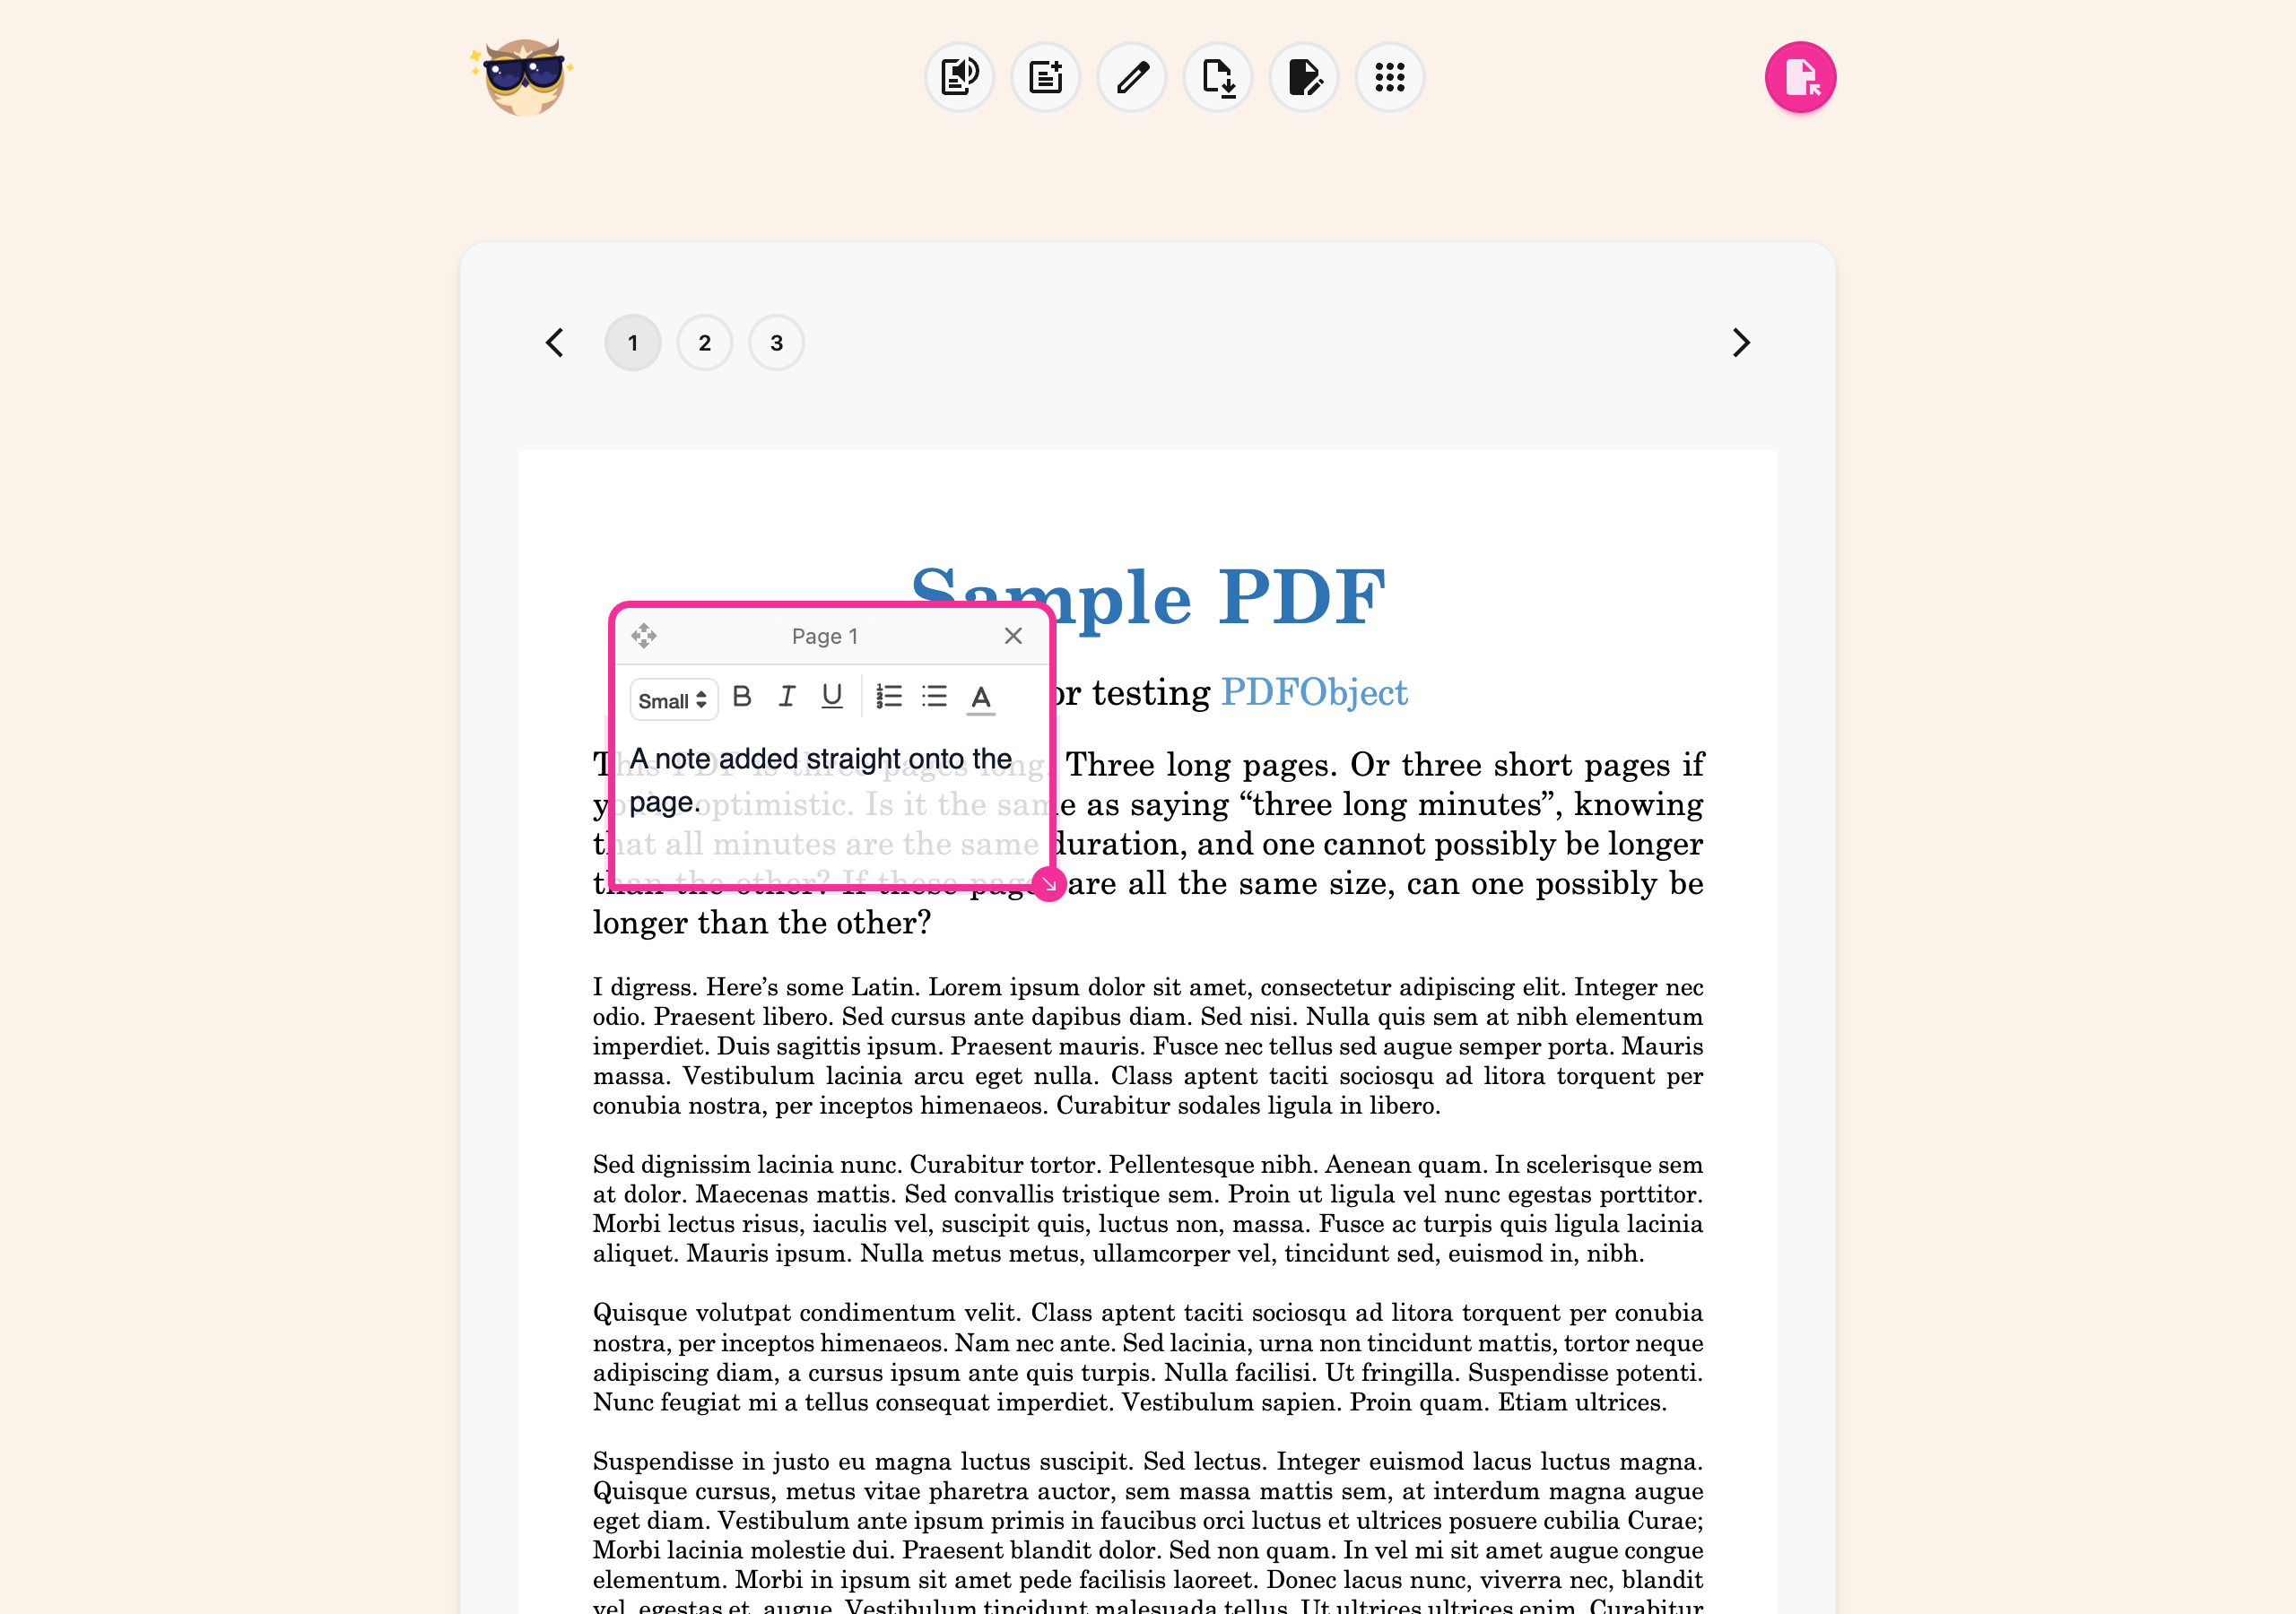
Click the Add Textbox button in the toolbar (the second icon, a page with a plus).
A text box appears on the page. From here you can:
- Type straight into it - click inside and start typing
- Format your text - the mini toolbar on the box gives you size, Bold, Italic, Underline, numbered lists, bulleted lists and text color
- Move it - drag the handle in the top-left corner to reposition it anywhere on the page
- Resize it - drag the pink handle in the bottom-right corner
- Delete it - click the × in the top-right corner of the box
Add as many text boxes as you need, on any page. Each one is tied to the page it was placed on.
Step 3: Draw and Mark Up the Page
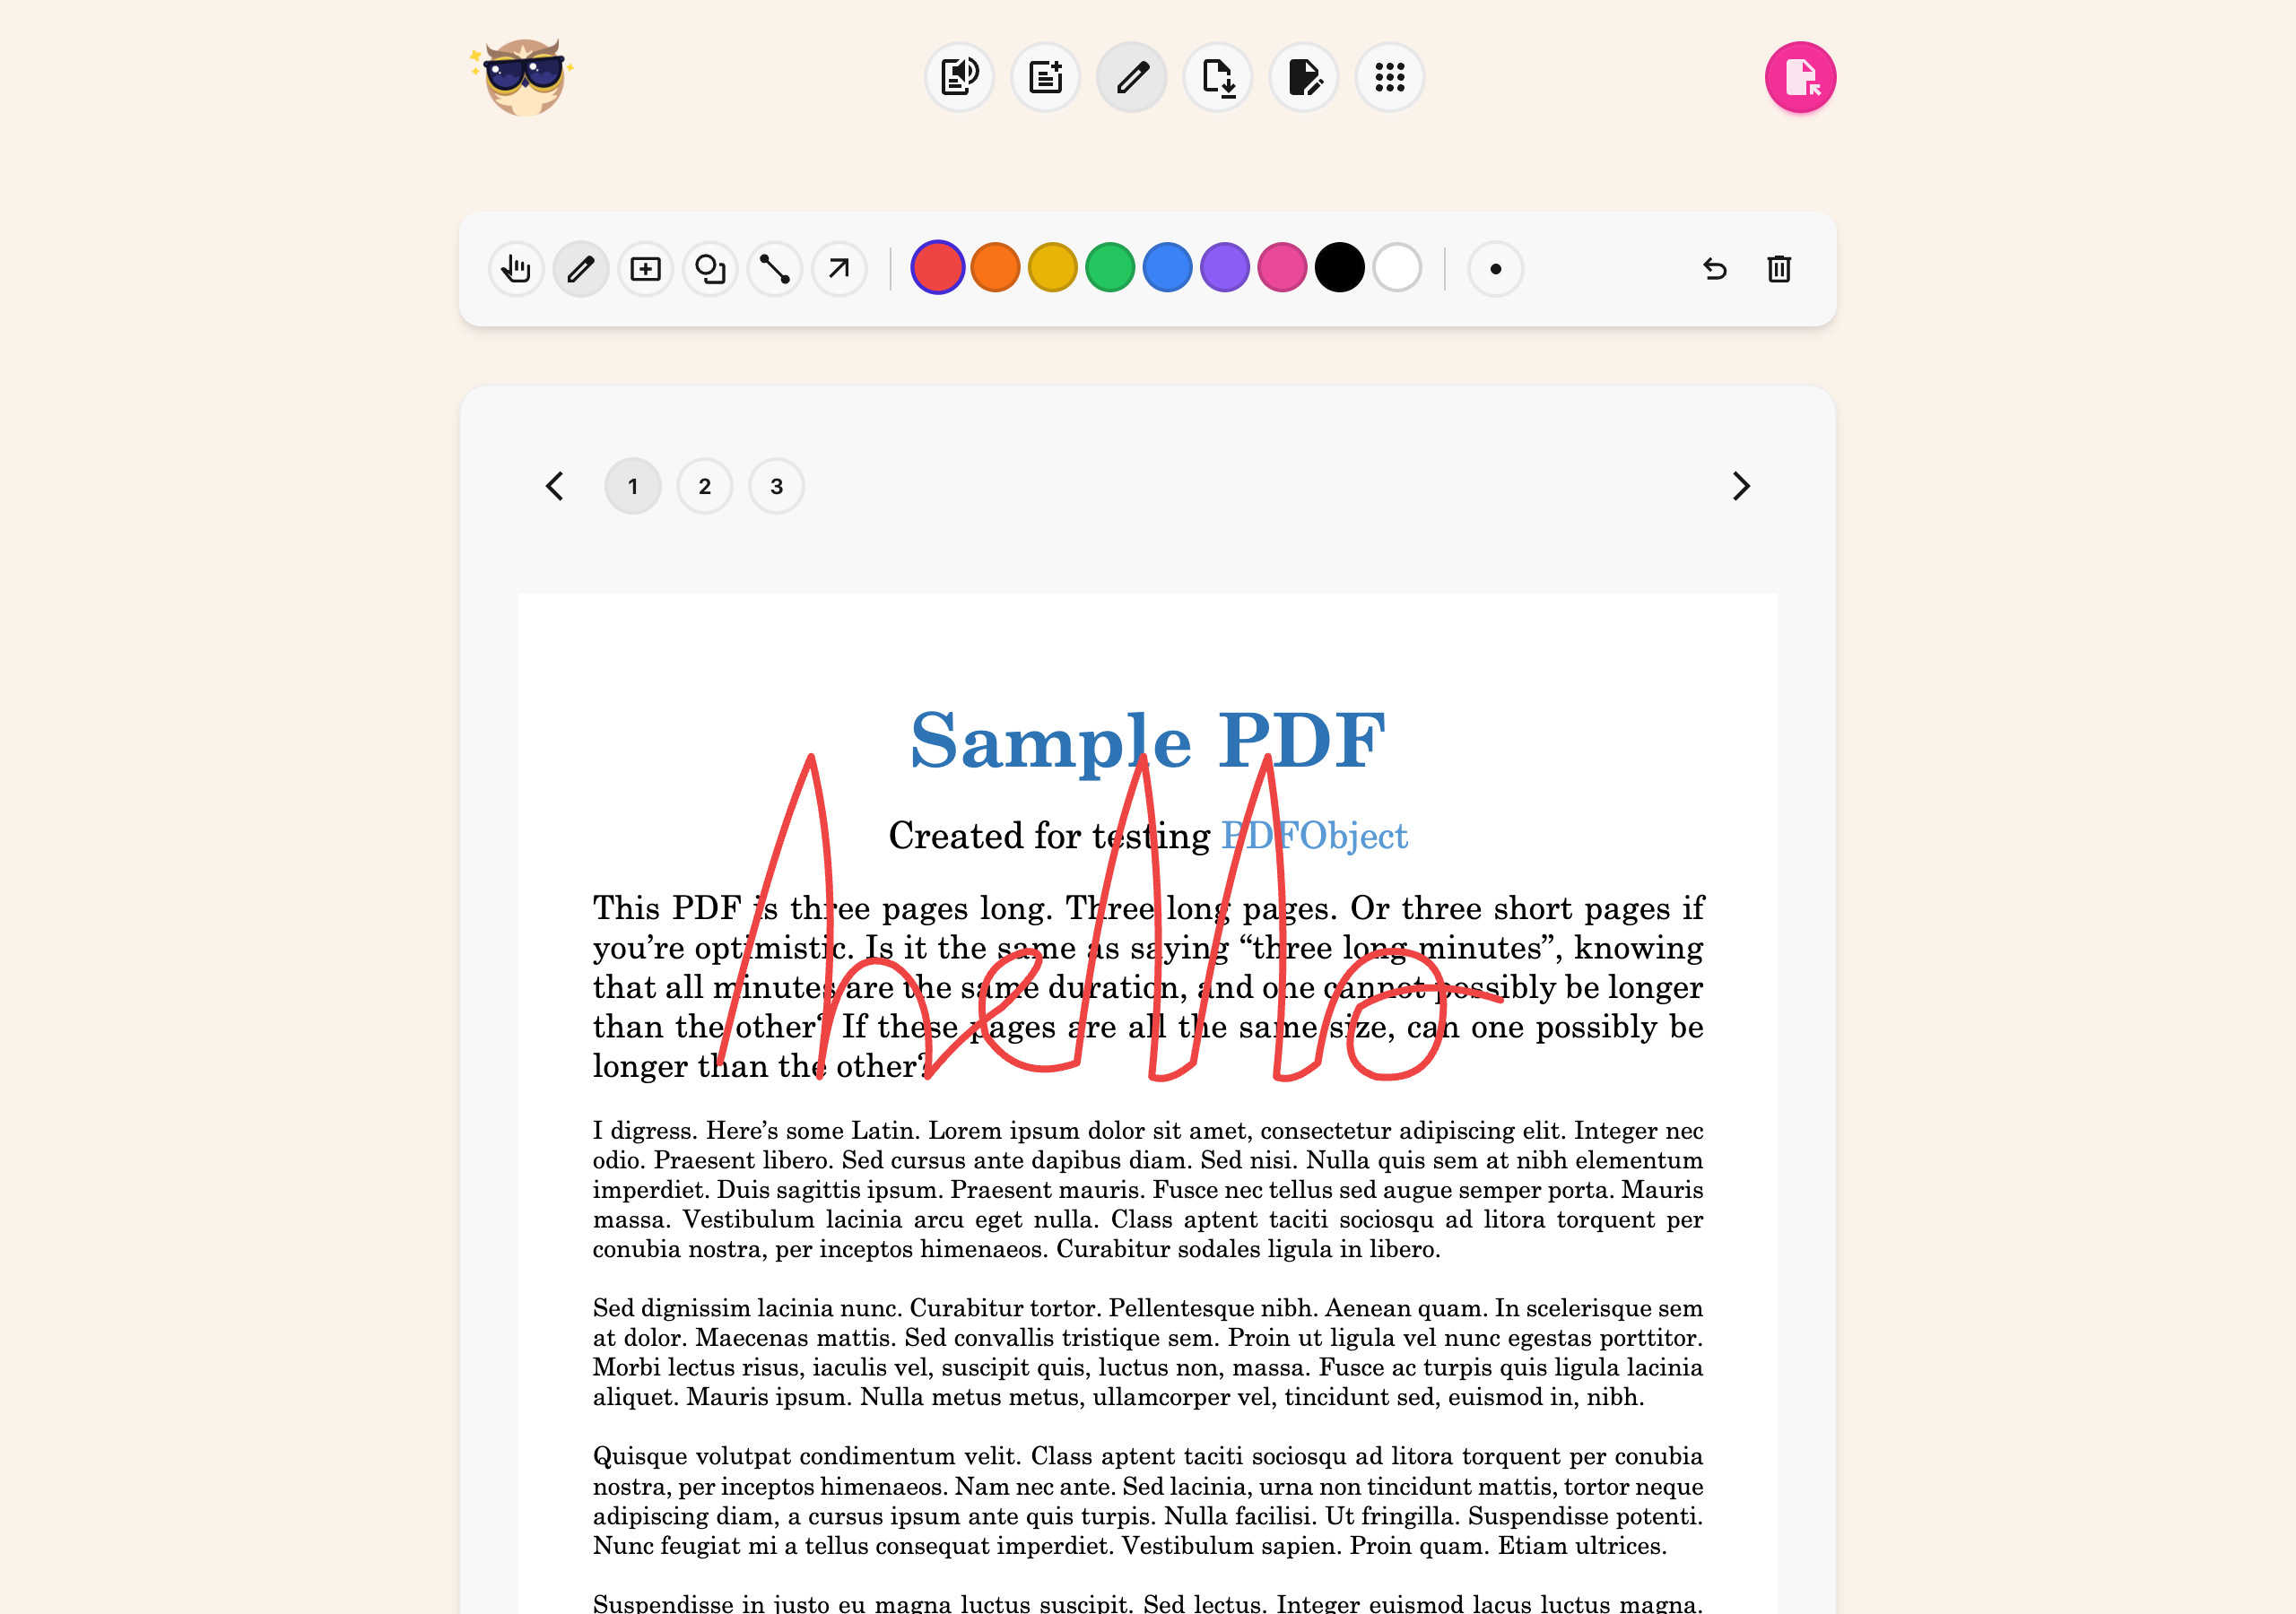
Click the Draw button in the toolbar (the pencil icon). A drawing toolbar appears with:
- Select / Move - pick up a shape you have already drawn, move it, or delete it
- Pen - freehand drawing
- Rectangle and Oval - shapes for boxing things out
- Line and Arrow - for pointing things out
- Nine colors - red, orange, yellow, green, blue, purple, pink, black and white
- Stroke size - cycle through thin, medium, thick and extra-thick
- Undo - remove the last shape you added, on this page only
- Clear all - remove every drawing on the page
Switch to the Select tool to click, move or delete a drawing you have already made. Your marks stay on the page when you close the drawing toolbar.
This is perfect for circling answers, crossing out, underlining key passages, or drawing arrows to link ideas.
Step 4: Take Notes Alongside the PDF
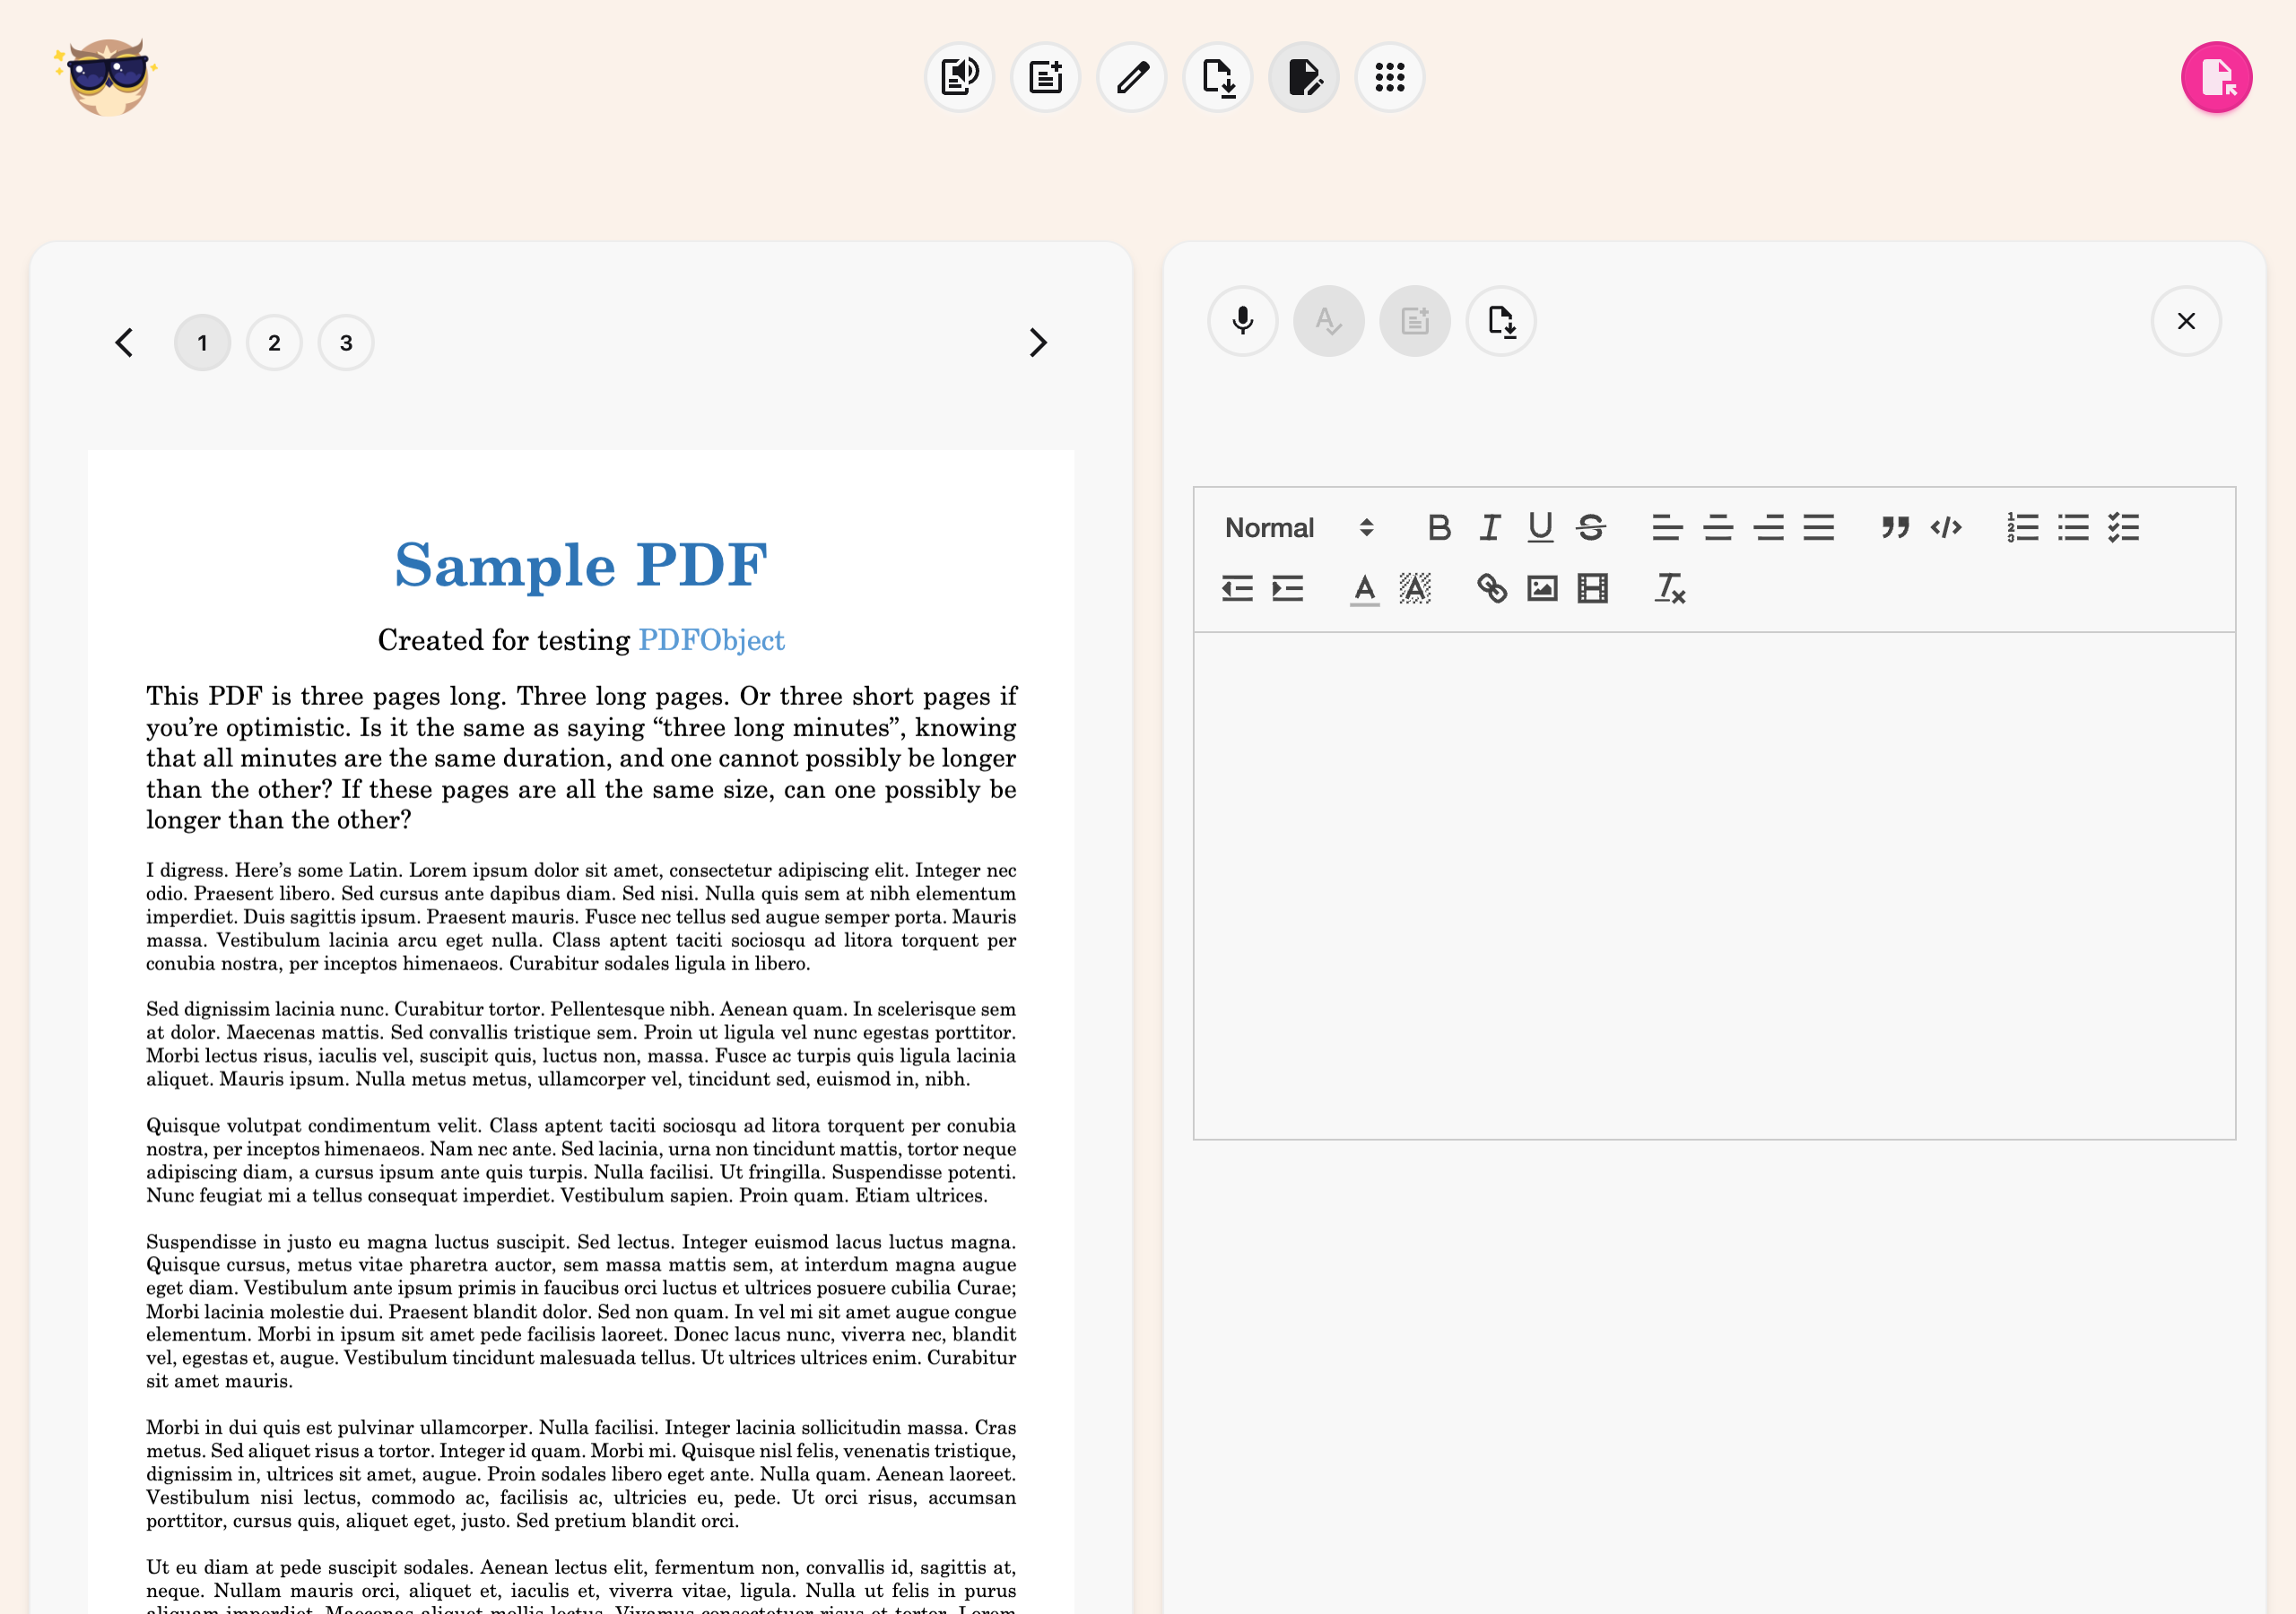
Click the Notepad button in the toolbar. The screen splits, with the PDF on the left and a full notepad on the right.
Typing, formatting, adding notes to the page and printing are free. Voice typing and grammar need Helperbird Pro.
In the notepad you can:
- Type notes with full formatting (headings, bold, lists, links, images, quotes)
- Use voice typing - click the microphone icon and dictate instead of typing
- Run a spelling and grammar check on what you have written
- Push notes onto the PDF - click the Add Textbox to PDF button to insert your notes as a text box on the current page
- Print your notes - the Download note button opens your browser's print dialog with the notes in it. It does not save a file, so choose Save as PDF there if you want one
Step 5: Export Your Annotated PDF
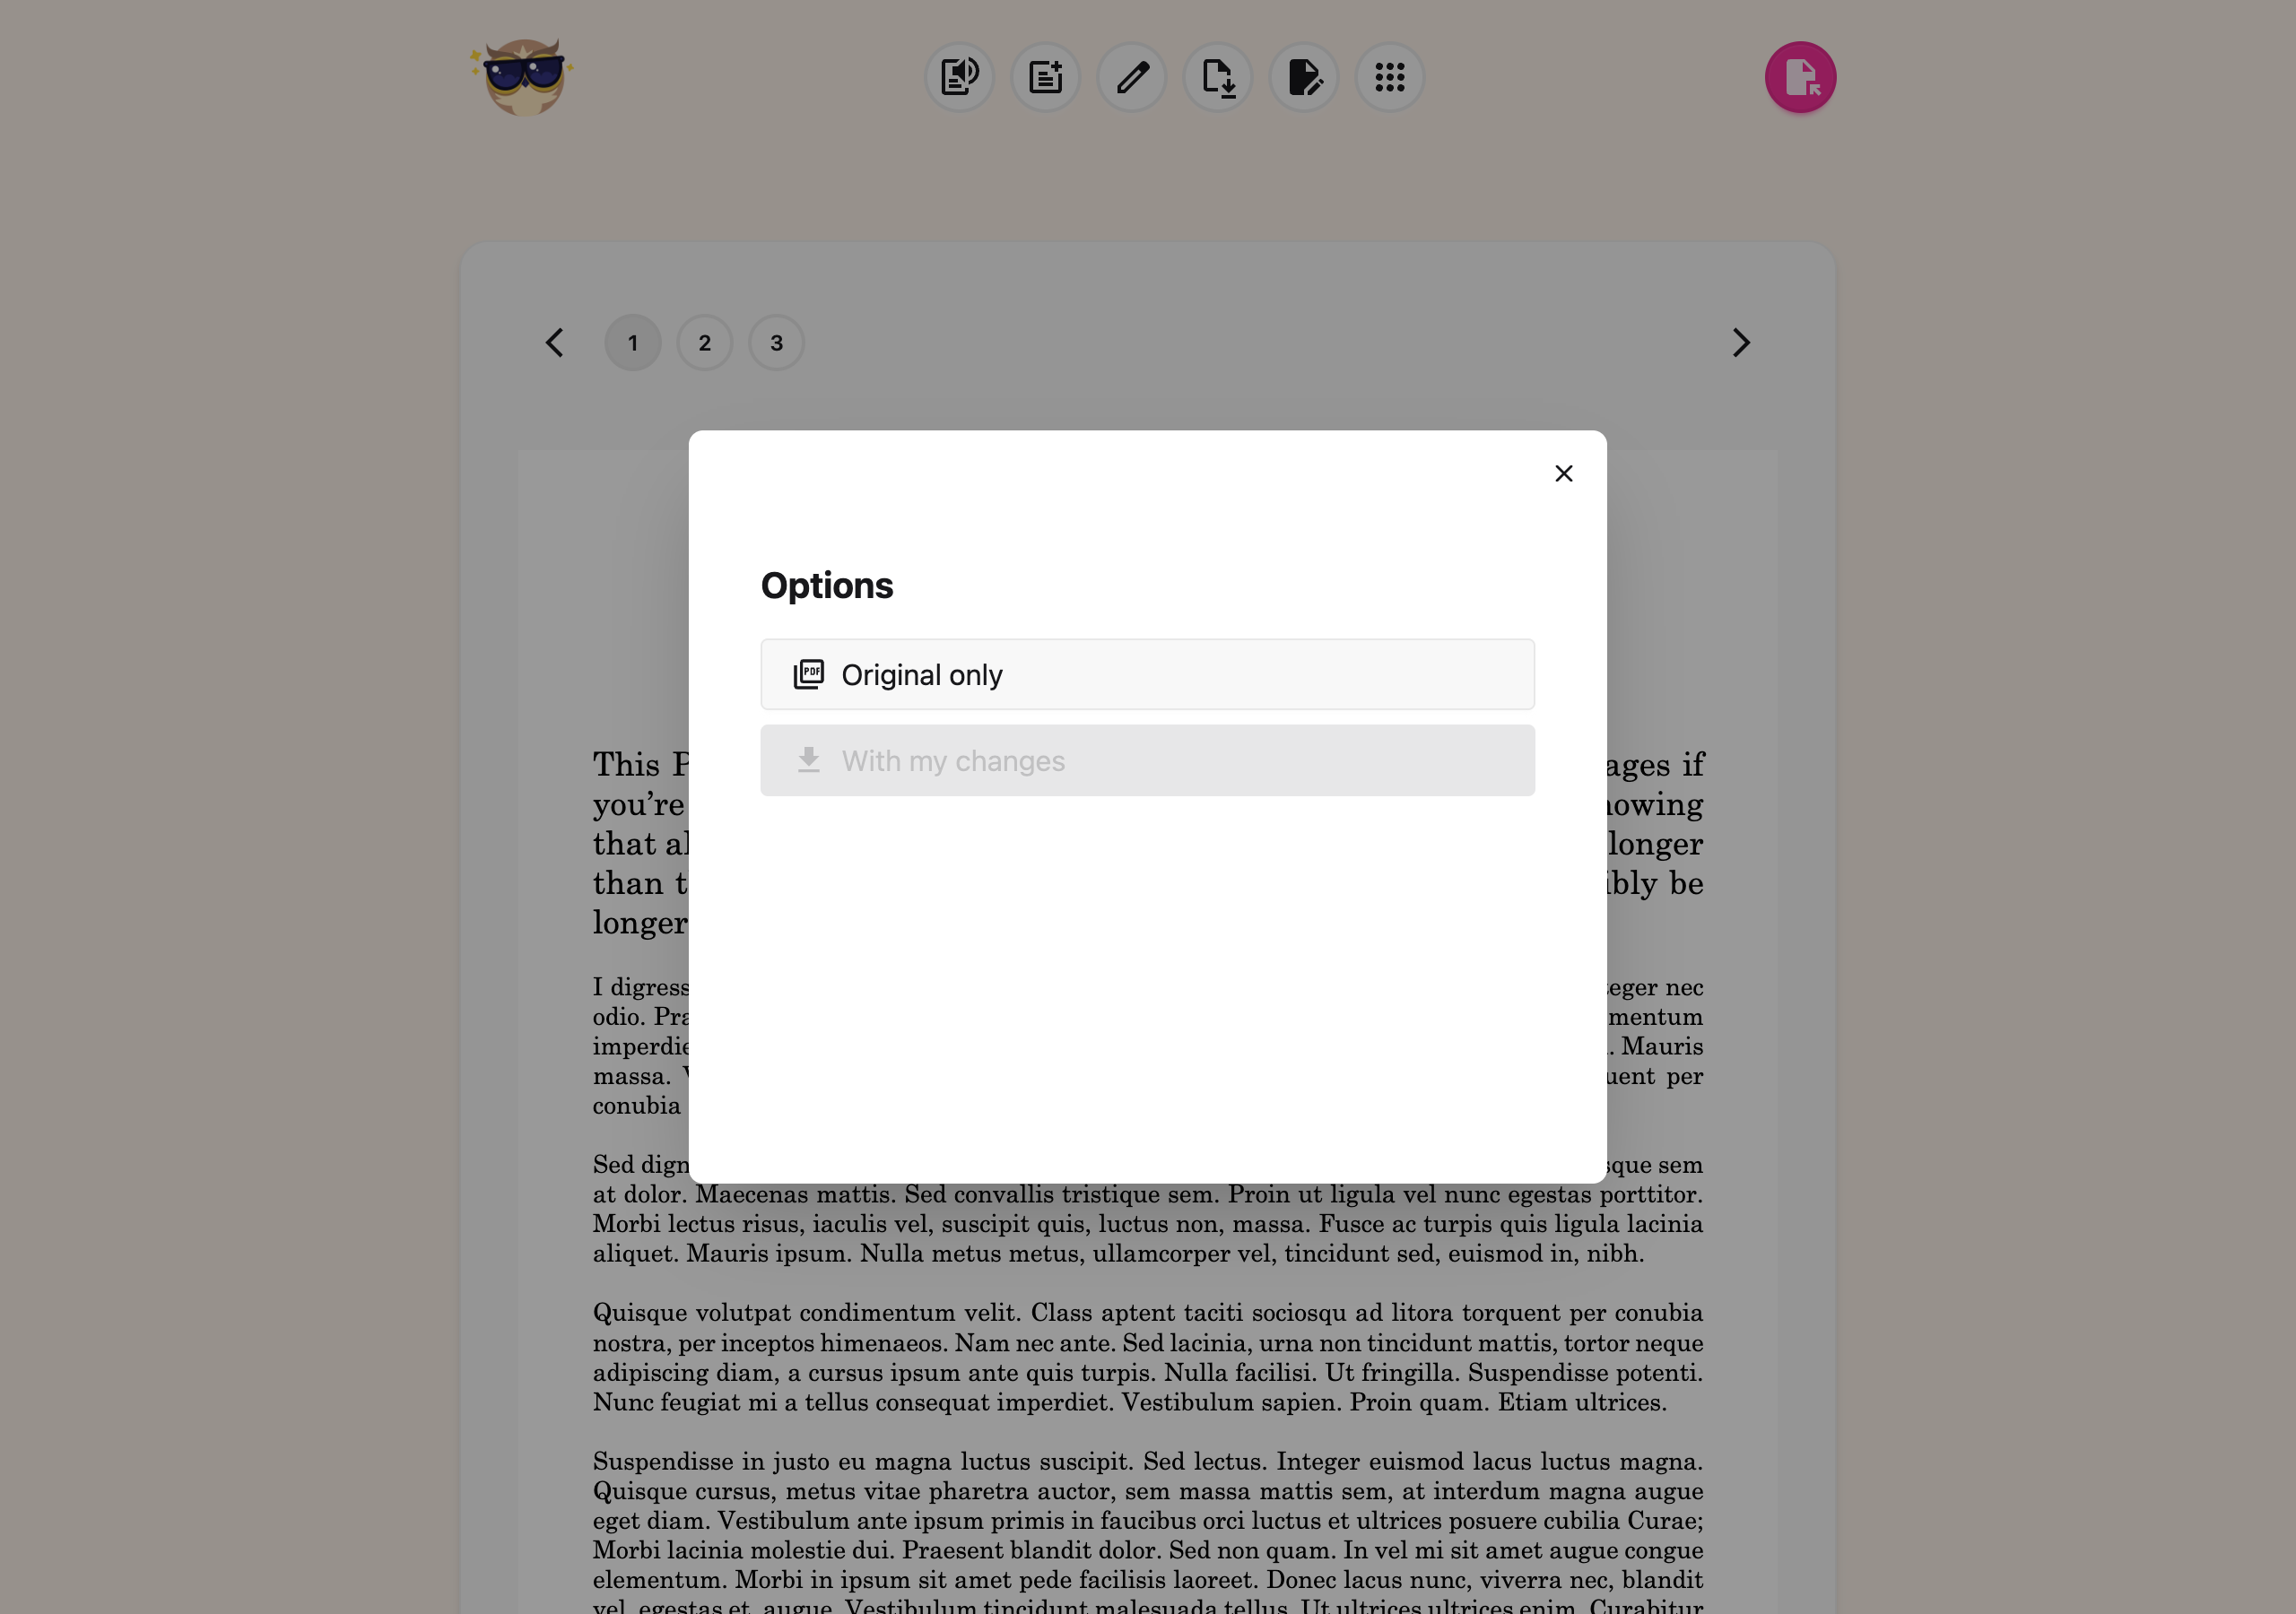
When you are happy with your annotations, click the Download button in the toolbar (the page with a down arrow).
An Options window opens with two choices:
- Original only - downloads the PDF exactly as it was, with none of your changes
- With my changes - downloads the PDF with every annotation permanently embedded
Choose With my changes. The file saves to your device's downloads folder with _annotated added to the name. That name comes from the title stored inside the PDF's own document properties, not the file name on your device. So a PDF titled Sample PDF downloads as Sample PDF_annotated.pdf, and a PDF with no title at all downloads as Helperbird PDF_annotated.pdf.
Open that file in any PDF viewer and your text boxes and drawings are there, exactly where you placed them.
If "With my changes" is greyed out, you have not added any annotations yet. Add a text box or a drawing first.
What Gets Exported
The exported PDF includes:
| Included | Details |
|---|---|
| Text boxes | All typed text, with formatting, in the position you placed it |
| Freehand drawings | Every pen stroke, in the color and thickness you chose |
| Shapes | Rectangles, ovals, lines and arrows |
| Notes added to the PDF | Anything you pushed across with Add Textbox to PDF |
The original PDF content is untouched. Your annotations sit on top of it. Anyone who opens the file will see them, whether or not they have Helperbird.
Your files stay on your device. Helperbird does not upload your PDFs to any server. The annotated file goes straight to your downloads folder, and from there you can submit it through Google Classroom, upload it to Drive or OneDrive, email it, or print it with the annotations included.
Tips for Classrooms
- Worksheets - students who struggle to handwrite can type directly onto the worksheet and submit it back through Classroom.
- Feedback - teachers can circle, arrow and comment on submitted work, then send the annotated copy back.
- Exam practice - students can mark up past papers and keep a clean original alongside the annotated version.
- Chromebooks - this works fully on managed Chromebooks with no extra software. See our admin deployment guide.
- Read it aloud first - click Text to Speech, the first button in the toolbar, or open Immersive Reader from the More options menu, so students can hear the document before annotating.
Troubleshooting
The green "Open PDF in Helperbird" button does not appear
Check that Helperbird has permission to run on file URLs if you are opening a local PDF. In Chrome, go to chrome://extensions, click Details on Helperbird, and turn on Allow access to file URLs.
My annotations disappeared
Annotations live in the reader session. Download the PDF with With my changes before closing the tab to keep them permanently.
The downloaded PDF looks blank in a preview
Some quick-preview tools do not render annotation layers. Open the file in a full PDF viewer such as Chrome, Preview, or Adobe Acrobat.
I only want the original back
Choose Original only in the download options. Your annotations are not written into that copy.
Related Guides
- How to Use the PDF Reader in Helperbird
- How to Add Text Boxes to PDFs
- How to Use Drawing Tools on PDFs
- How to Save and Download Annotated PDFs
- How to Share and Export PDFs with Helperbird
- How to Translate PDFs with Helperbird
- How to Use Helperbird for Reading Long PDFs
- How to Open PDFs with Helperbird in Google Drive, Classroom or Gmail
Need Additional Help?
If you have any questions or run into any issues, please contact the Helperbird support team. You can reach us at Helperbird support. We are happy to help you get the most out of Helperbird.
Printed from the Helperbird Help Center · Updated August 12th, 2026
Questions? We are happy to help — helperbird.com/support